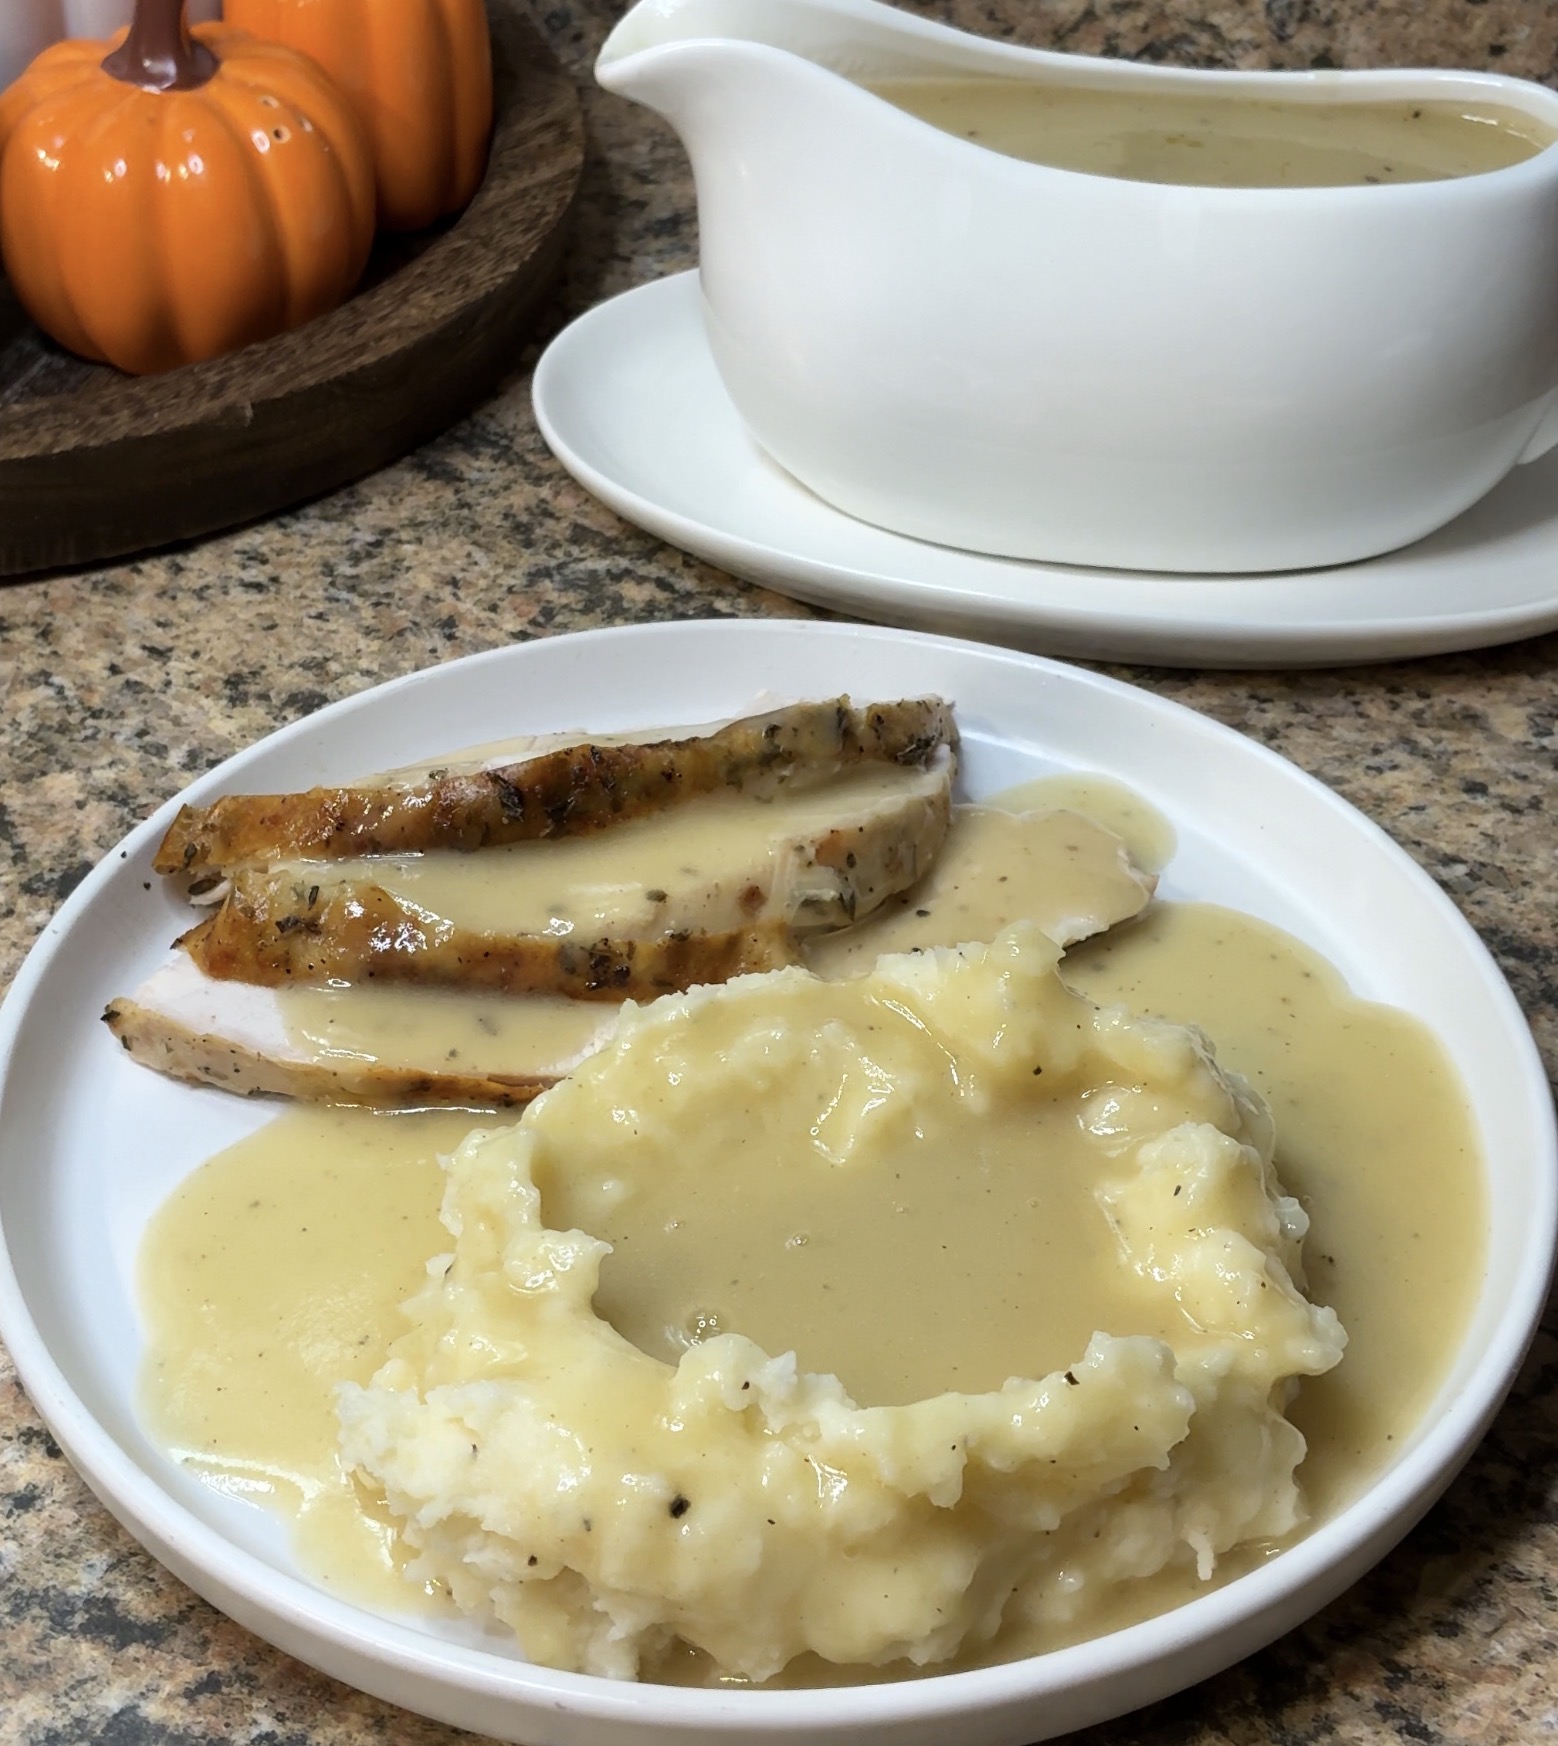
The aroma of a perfectly roasted turkey is undeniably a hallmark of holiday feasts. But what truly elevates that magnificent bird, and everything else on your plate, to an unforgettable culinary experience? A rich, velvety homemade turkey gravy recipe, crafted from the very essence of your turkey: its pan drippings. Forget store-bought packets and bland alternatives; making your own gravy from scratch is not only simpler than you think but yields a depth of flavor that is genuinely incomparable.
Imagine a gravy so infused with herbs, seasonings, and the caramelized notes of your Thanksgiving turkey that every spoonful is a taste of pure holiday magic. This isn't a pipe dream; it's a reality achievable in just about 20 minutes, a perfect task to undertake while your turkey rests. Even if you think you have minimal drippings, you'll be surprised at how much rich flavor can be extracted from just a few tablespoons. This guide will demystify the process, turning what many perceive as a complicated undertaking into a foolproof, fast, and intensely flavorful endeavor.
The Pan Drippings Secret: Unlocking Unrivaled Flavor
The true genius of making homemade gravy lies in utilizing what you already have – the precious pan drippings from your roasted turkey. These are not merely leftover juices; they are a concentrated elixir of all the herbs, seasonings, browned bits, and rendered fat that have lovingly basted your bird throughout its cooking process. This liquid gold is the foundation of any truly spectacular turkey gravy recipe, offering a depth of flavor that no store-bought alternative, no matter how highly rated, can replicate.
Many home cooks might feel intimidated by the idea of making gravy from scratch, or assume they need an abundance of drippings. The wonderful truth is that even a small amount – say, 3 to 4 tablespoons of the flavorful fat and juices – is enough to create a robust and delicious gravy. These drippings carry the unique character of your turkey, seasoned exactly to your liking, and they imbue the gravy with an authenticity and richness that tastes like you've spent hours perfecting it, when in reality, it's a quick and efficient use of resources. This approach not only saves you money but ensures your gravy is perfectly harmonious with the star of your meal.
Mastering the Roux: The Foundation of Velvety Gravy
At the heart of any truly smooth and luscious gravy is the roux. A roux is a fundamental cooking technique involving cooking equal parts fat and flour together. This simple mixture serves a dual purpose: it thickens your liquid base to a desirable consistency and, crucially, cooks out the raw taste of the flour, replacing it with a subtle, toasty, nutty flavor that adds complexity to your gravy.
Essential Tips for a Perfect Roux:
- Skimming the Fat is Key: Before you even think about the flour, you need to properly skim the fat from your turkey drippings. As the drippings rest, the fat will rise to the top. Carefully spoon off about 3 to 4 tablespoons of this fat. Why is this important? Too much fat can result in an oily or greasy gravy, diminishing its luxurious texture. A neat trick is to skim the fat while the pan is still warm, as it separates more easily. If you have a fat separator, it makes this process virtually foolproof, delivering perfectly clear, flavorful juices below.
- The Golden Ratio: Equal Parts Fat and Flour: The secret to a silky, lump-free gravy lies in maintaining a 1:1 ratio. For instance, if you've skimmed 3 tablespoons of turkey fat, you'll whisk in 3 tablespoons of all-purpose flour. This precise balance ensures your gravy thickens beautifully without becoming gummy or pasty.
- Cooking the Roux to Perfection: Once the fat and flour are combined in your saucepan, cook them over medium heat, whisking constantly. You’re looking for it to bubble and turn lightly golden and fragrant. This usually takes about 2 to 3 minutes. The goal isn't to create a dark brown roux (unless you're aiming for a very specific, dark Cajun-style gravy), but rather to sufficiently cook the flour to eliminate that raw flour taste and develop a smooth, toasted flavor.
Crafting Your Gravy: From Drippings to Deliciousness
With your perfect roux prepared, the next step is to transform it into the velvety gravy of your dreams. This is where the magic truly unfolds, integrating your precious turkey drippings and, if desired, a rich stock.
Step-by-Step Gravy Creation:
- Prepare Your Liquid: After skimming the fat for your roux, you'll be left with the strained, concentrated turkey juices. These are incredibly flavorful. For an even richer gravy or if you need to feed a larger crowd, consider preparing a quick giblet stock. Simply simmer the turkey neck and giblets (excluding the liver, which can make it bitter) in water with some aromatics like onion and celery for 30-60 minutes, then strain. This adds an incredible, old-fashioned depth to your gravy. You can learn more about this versatile method in our article Easy Turkey Gravy: Delicious & Quick from Pan Drippings.
- Slowly Add Liquid to Roux: This is arguably the most critical step for lump-free gravy. Gradually pour your strained drippings and/or stock into the roux, whisking continuously. Start with a small amount, allowing the roux to fully absorb it and create a thick paste, then add more liquid, slowly building up the volume. Adding warm liquid instead of cold helps prevent lumps and ensures a smoother blend.
- Whisk and Thicken: Continue to whisk vigorously over medium heat as the gravy comes to a gentle simmer. It will gradually thicken as it cooks. Keep whisking to ensure a silky-smooth texture and prevent any sticking to the bottom of the pan. This process usually takes about 5-10 minutes.
- Adjust Consistency and Seasoning: Your ideal gravy thickness is a matter of personal preference. If it's too thick, simply whisk in a bit more warm stock or water until it reaches your desired consistency. If it's too thin, let it simmer gently for a few more minutes, allowing it to reduce and thicken naturally. Taste and adjust the seasoning with salt and freshly ground black pepper. Remember, your drippings are already seasoned, so add salt cautiously.
The beauty of this turkey gravy recipe is its flexibility. Whether you have drippings from a modest 8-pound turkey or a colossal 20-pound bird, you can adjust the amount of stock to achieve the perfect volume and flavor. This makes it a truly Foolproof Turkey Gravy Recipe Using Your Turkey Drippings, adaptable to any holiday table.
Beyond the Basics: Elevating Your Turkey Gravy Recipe
While a classic turkey gravy made from pan drippings is phenomenal on its own, there are several ways to infuse even more complexity and bespoke flavor into your creation. These enhancements can take your turkey gravy recipe from delicious to utterly unforgettable:
- Herb Infusion: For an extra aromatic punch, consider adding fresh sprigs of thyme, sage, or rosemary to your stock as it simmers, or even directly into the finished gravy for a few minutes before straining them out. Their delicate flavors will meld beautifully.
- Aromatic Boost: Before adding the flour for your roux, gently sauté finely minced shallots or a touch of garlic in the skimmed turkey fat for a minute or two until fragrant. This adds an incredible savory depth without overpowering the turkey flavor.
- A Splash of Wine or Sherry: For a sophisticated twist, deglaze the roasting pan with a dry white wine or a splash of dry sherry after removing the turkey. Scrape up all those browned bits from the bottom of the pan – this concentrated flavor will add wonderful complexity to your drippings before you even start making the roux. Just reduce the wine slightly before adding your stock.
- Umami Power-Ups: A tiny dash (think a quarter to a half teaspoon) of soy sauce, Worcestershire sauce, or even a mushroom broth can subtly enhance the savory, umami notes of your gravy without making it taste distinctively of those ingredients. Add sparingly and taste as you go.
- Finishing with Fat: Just before serving, whisk in a small knob of cold butter. This "mounts" the gravy, giving it an extra sheen, a velvety mouthfeel, and a final kiss of richness.
Conclusion
Making homemade turkey gravy from pan drippings might seem like an undertaking best left to professional chefs, but as you've discovered, it's an incredibly straightforward and rewarding process. In just 20 minutes, using the flavorful essence of your roasted turkey, you can create a gravy that is unparalleled in its richness, depth, and velvety texture. This turkey gravy recipe isn't just about thickening a sauce; it's about harnessing the full spectrum of flavors from your holiday bird and presenting them in a liquid form that enhances every single component of your meal. So, this holiday season, embrace the pan drippings secret. You'll be amazed at the compliments and the sheer satisfaction of spooning that warm, luxurious gravy over your turkey, mashed potatoes, and stuffing – a true testament to the simple magic of homemade cooking.
